Crafty Blogs

Sunday, 16 September 2012

New from The Lucky Ladybird

I'm pleased to say my new sushi-based creations are now available to buy on my etsy shop. I have three cute sushi coin purses available, but for those who have been waiting for the handbags (as featured in my previous post sushi crafting - a retrospective) I will be working on a few over the next few days and will hopefully have some ready by next week.


Let me know what you think! Love and luck,
 
The Lucky Ladybird x x x

Friday, 14 September 2012

Sushi crafting - a retrospective

Once upon a time, in the distant land of Chester in 2007, I decided I wanted a handbag that looked like a sushi roll. This might have been a pretty wacky notion but sushi has been my favourite food since I was a teenager and I've always loved the cute and cuddly, so I thought it would make an awesome accessory. I scoured the internet, convinced that someone, somewhere, would be selling one, but to no avail. Nobody was making them, so I decided to make one myself. I went out and bought a second-hand barrel style handbag and covered it with fleece and felt so it looked like a sushi roll. This is how it looked when I was done.


I covered the zip with a felt version of a soy sauce dropper and it was done. It was a little rough and ready, but as a first try I think it worked out nicely.

At the time my husband was working in a little Japanese-themed gift shop called Tokyo Jazz Panda. TJP is now online-only, but at the time it was also a little shop. I went to visit my husband at work and the owner of TJP wanted to know where I got my sushi bag from. When I told him I'd made it myself he asked me if I'd consider making them for the shop. Within a few weeks I'd been given my own shelf in the shop and made lots of sales, of the handbags and also of some small badges, key rings and pin-cushions.


After we left Chester I continued to sell sushi bags on my etsy store but the return to education and then to full-time work meant I didn't have time to make my larger pieces any more.
 
Well the good news is I've started making sushi accessories again. I'm starting small with some sushi purses but I'm hoping to be making full-size maki roll handbags again in the next few weeks. Photos to follow soon, but keep an eye on my etsy store for more updates. 
 
Thanks for reading. If you're interested in any of the creations above or would like to commission something even weirder please let me know. Leave a comment or email me at luckyladybirdcraft@gmail.com.
 
Stay lucky! x x x


Saturday, 4 August 2012

Mini sushi pendant

For those of you who enjoyed my sushi-based crafts you might like to take a look at issue 2 of Cassiopeia Magazine, the creative arts magazine I created and edit. I put together a quick mini sushi pendant tutorial  for the craft section of the magazine. Very simple and quick, you only need 2 buttons, a few seed beads and some felt.


For the full tutorial follow the link and click to zoom in. 

The third issue of the magazine should be coming out in October, so watch this space for more tutorials soon!

In the mean time if you enjoy reading the magazine we're on Facebook and Twitter and contributions are always welcome (craft-based or otherwise). Enjoy!

The Lucky Ladybird x

Sunday, 6 November 2011

Curious Cushion

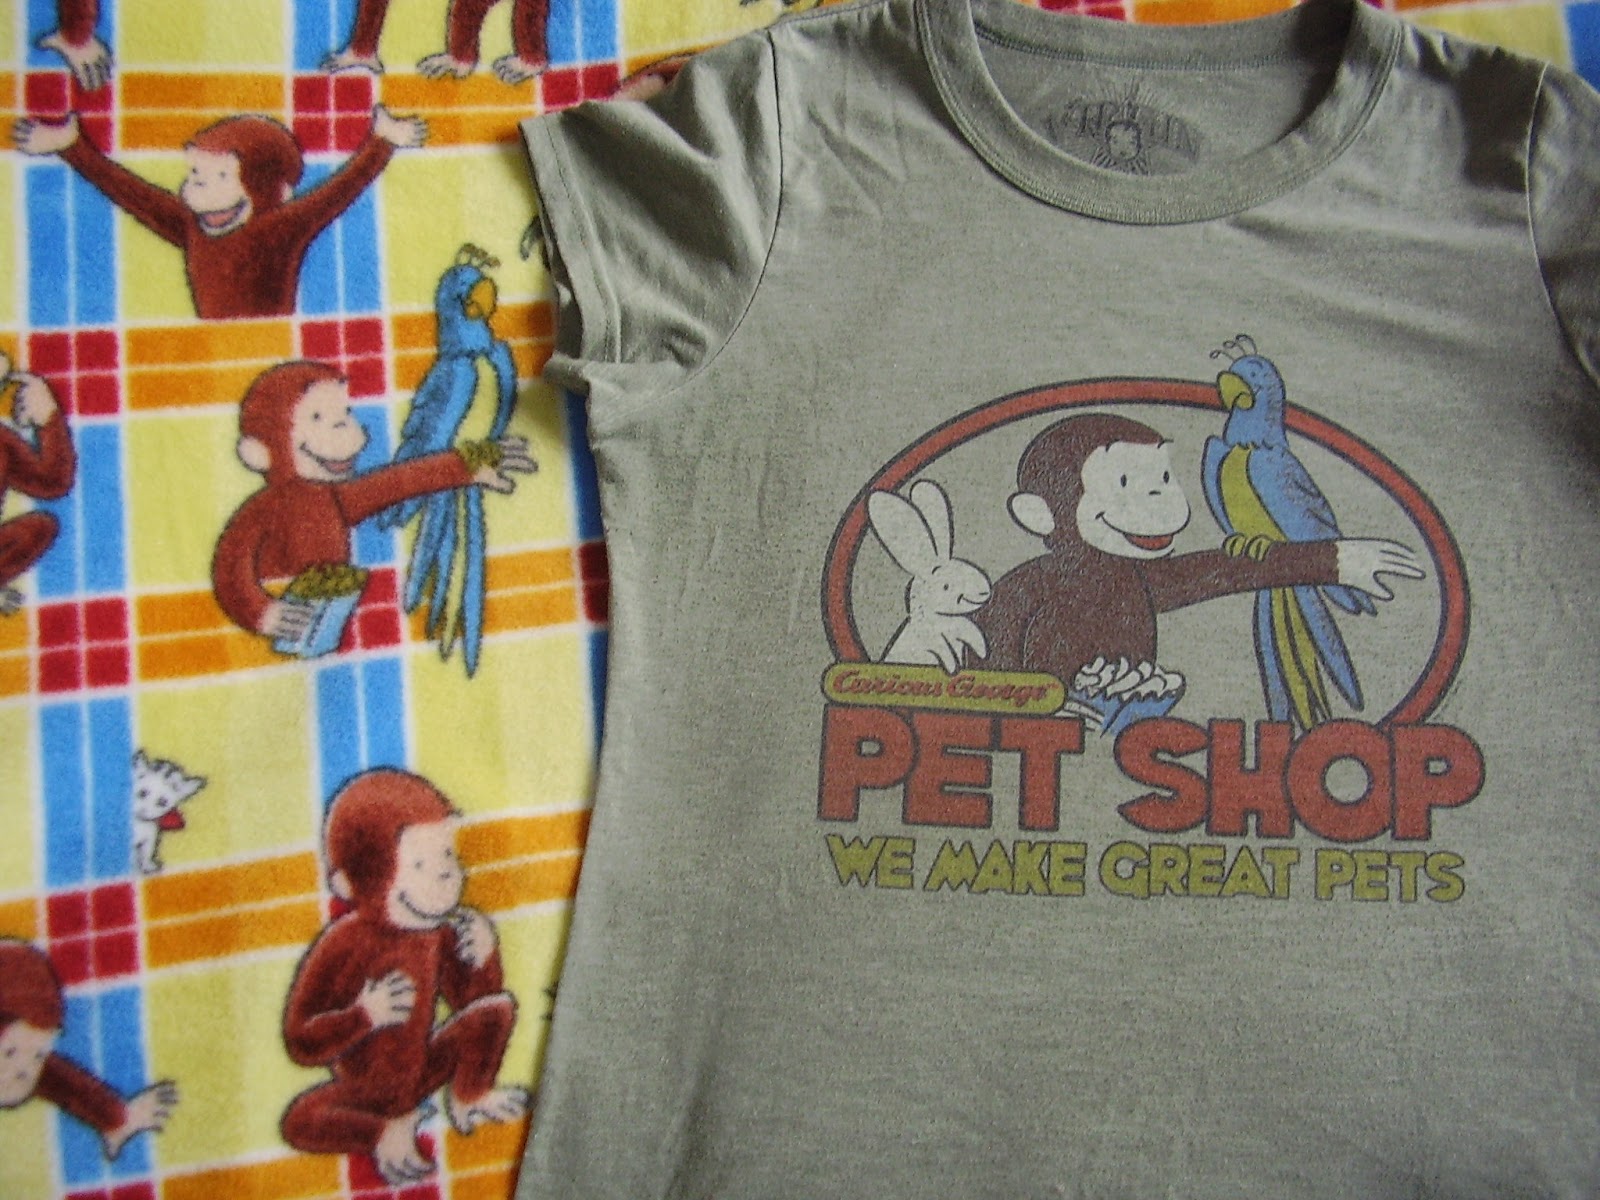
This week I finally got around to completing a craft project that I began about three years ago. Shameful really, but I came across this adorable fabric on sale in a local shop before we moved into our current house. At the time my favourite t-shirt was a the one pictured, a Curious George t-shirt, so when I saw this fleece that matched so perfectly I couldn't resist it!


At the time I wasn't sure what to make with it. There wasn't quite enough fabric to make a throw, so I considered making a big cushion cover, but we didn't have room for a large cushion at the time as we were living in a very cramped shared house. So I'm sorry to say the fabric was tucked away in a box, and although we took it with us when we moved I virtually forgot about it.

This weekend I came across the fabric again and decided it was time to make use of it. We have plenty of room now, and a nice big sofa to put cushions on.


I used some clear buttons from the button jar as fasteners so that the lovely colours show through.


It's so good to have the fabric on show after it was hidden away so long and it really brightens up the living room (which was almost in danger of looking like adults live here for a moment).

Truth by told it was lovely to make something this weekend that wasn't wedding related. I'm still slogging through making bunting because even though the full size bunting is finished (around 40 metres of the stuff) I'd like to use up the remainder of the fabric by making some mini table bunting. I'm also still on the hunt for potential centre pieces and other decorative touches. Happily there's still lots of time, about six months, before the big day.

Wish me luck (I think I'll need it!)

LL

Saturday, 15 October 2011

Pumpkin Pincushion


This is a quick guide to creating a truly terrifying Halloween pumpkin pincushion. Pierce them through with pins or have them haunt your desk or Halloween table display.

First cut six identical leaf shapes around 3.5" in length from orange felt.


Sew the long edges of these pieces together in matching thread to create a ball shape, but leave one seam open. Turn the ball right side out.


Cut the eyes and mouth from black felt. For eyes cut matching triangles. For a mouth draw a zig-zag on the felt in chalk and cut around this to create a jagged jaw.


Arrange the features and sew them in place while the ball in still open at the back, only a couple of stitches will be needed to keep them in place. Next stuff the pumpkin with toy filling, or failing that cotton wool. When tightly packed join the final seam with a neat blanket stitch. Your creation is now almost alive!

Finally cut a thin strip of brown felt around 1.5" long and 0.5" thick. Roll this length up to create the stalk.


Secure this roll in place with a couple of stitches, but before tying off the thread press the stalk on to the top of the pumpkin and draw the needle through the body of the pumpkin and out of the bottom. Pull the thread tight to create the right pumpkin shape. Finally push the needle back up through the body of the pumpkin and secure the stalk. Pierced twice through the heart your should be a truly diabolical creation!


Happy Halloween everyone!


Sunday, 9 October 2011

Vintage Crafting


I always find living museums inspire me to craft. Getting a glimpse into the way people lived only 100 years ago always reminds me of the utility of skills like sewing, weaving and knitting. It's easy to forget that lots of popular crafts arose out of a need to make use of every scrap of material that was available. Quilters now seem to spend a small fortune on fat quarters in co-ordinating colours, but in the past quilts were a thrifty use of fabric scraps too small to be fashioned into anything else.

Another craft that makes clever use of small scraps of fabric is rag-rugging. With a section of hessian, and a collection of cotton or wool scraps you can make a soft and colourful rug. Last week I went on a day trip to Blists Hill Victorian Town in Shropshire, a recreation of a Shropshire town during the industrial revolution complete with railway, fairground and working high street. We saw demonstrations of metal working, candle making, baking and wood working but my attention was caught by a sample rag-rug kit. All the recreation homes in the town were furnished with rag rugs and I decided it would make a lovely souvenir of the day.

The kit came in a paper bag and contained a square of hessian (about 13" square), a wooden prodding tool and a bag of cotton strips, mostly of green white and pink. I ended up supplementing the fabric scraps with some of my own to add colour and also to use up some small pieces of fabric I had spare.


The method recommended in the instructions was to 'prod' the fabric through the hessian from the back of the work rather than to hook it through from the front.It was very quick and easy to create rows of prodded strips.


To finish the rug I folded the 1" allowance back and sewed it into place. The instructions suggested using fabric glue for a no-sew option. The final result is lovely, if a little small.


The floral strips you can see this photo were offcuts from making bunting, something I'll be posting about next week.

I'd recommend the kit as a gift for anyone looking for some crafty inspiration. Now I know how easy rag-rugging is I'm determined to make a larger one for my living room, and I've certainly got a large enough collection of fabric scraps that would otherwise go to waste, so that's lucky!


Wednesday, 23 March 2011

A daffodil for springtime


It looks like spring has finally begun, and in this part of the world the daffodils are opening. Here's a quick guide to creating your own daffodil to celebrate!

You will need:
Yellow, orange or white felt
Needle and thread
A button
A safety pin

1. Cut a semi-circle from your chosen colour of felt. Cut notches into the outside edge of the circle. Curl the semi-circle into a cone and sew together where the edges meet.


2. Cut a circle from felt and fold and cut as shown to divide the circle into six petals.


3. Shape each petal as shown.


4. Push the button into the cone and the cone onto middle of the petals. Sew the button in place through all layers to bind everything together.


5. Sew a safety pin onto the back and wear with pride!